For your Friday viewing pleasure…

Black gesso painted applied for the base. I’m usually rocking out with the headphones as I do this part.

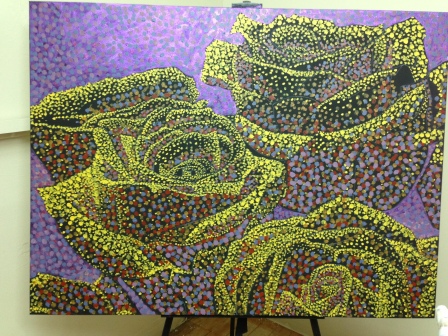
3’x4′ canvas ready to go. The painting on the left is what it “could” be when it grows up.

Using a white pastel pencil and a scaled graph, I pencil in the lines from a photo reference.

My studio neighbor noticed that all of my dots were uniform in a previous painting. I thought I would play with small, med and large-sized brushes. I find it creates a lovely sense of movement with the dots, but is mostly noticeable between the large and small sizes.
I’m starting with a red since the roses are sort of orangey-yellow. My hope is the red will peep through nicely at the end.

I added some purple interference because I love purple sparkles and interference looks lovely on top of black. However, interference with liquid acrylic or perhaps dots (I’m not sure which), created foam in some places. Whoops!! The nice thing about acrylic is that I’ll be able to cover the sketchy spots. Admittedly, it takes more time when working with dots…
Back to some yellow for the roses themselves as well as getting in some of the highlights.

Going back to some medium tones. Sometimes it seems like you have to go back and forth a bit.
Again, more yellow for the roses, but adding some darker darks too for shaping and depth.

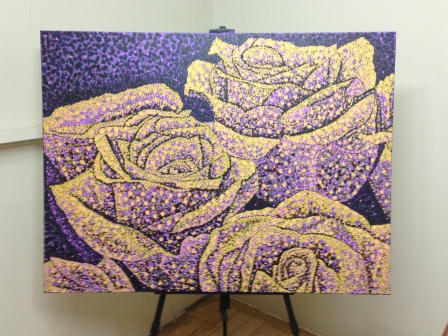
A close up of some really light highlights. It looks subtle here, but check it out on the middle rose below when you step back a foot or so…

Cool, huh? I just love the fact that distance and closeup viewing is so different, but just as engaging.

For my final steps I sponged out the initial white lines, leaving black lines in their wake. I then put a cool red glaze on some of the pieces of roses I wanted to push back visually for the sake of movement within the painting.
I’m not sure exactly how long it took to paint the whole thing, but I’m guessing somewhere around 40 hours.
Let me know if you have any questions about this painting. I’m happy to share.


